Sunday 29 March 2015

Time Flies When Your Having Fun!

Location scout selfie
Well, where to start? I shall start with a bit of an update on the things that I spoke about in my last post. I have opened a bank account for the project (with Callum - the 2IC), been on two location scouts (which we have finalised some filming locations from) and have had meetings here, there and everywhere. So for this week, my production team and I have heaps of jobs to get done as we film in two weeks time! The list of things to do this week are:

- Put Small Colossus Media (this is the finalised name of our production company) logo onto all of our new social media
- Film our Pledge Me video and publish our project
- Organise camera, lighting and vfx equipment needed for our film shoot (this includes gaining permission to have the gear from SIT for two weeks solid and finding storage for all of it too)
- Create a pamphlet to explain our project and tell people about us
- Get our budget finalised
- Confirm and get permissions for all of our filming locations
- Book vans to use for the two weeks of test shooting and actually filming
- Complete a website for Small Colossus Media
- Complete a material sourcing run
- ORGANISE! ORGANISE! ORGANISE!

Brain Overload!!!!!

As of Monday 30th March, we have at least four team members away on internships on the Pete's Dragon feature film shoot in Tapanui for at least a week. We have our Director, 2IC, 1st Assistant Camera and our 2nd Assistant Camera going away to do internships on it. We should be fine while they are gone, as I have orgasnised with these people how we will deal with not having them around for this week.

So..... THERE'S HEAPS TO GET DONE!!!!!! But I am just going to work through each task to complete them all in time for filming. BRING IT ON!!!!! AND REMEMBER........> BREATHE AND KEEP CALM!!!!!

Peace and Tranquility


Engaging Films

What makes us engage with a film?

ENGAGED!!!!


In class, we discussed what made us engage with a film. Here is what we decided:

- Characters that we care about
- Story: a plot that is logical and makes sense
- True to the world it is created/set in
- Is surprising and avoids predictability, tropes/cliches
- Universal themes (or issues that resonate with the audience)

We spoke about the TPPA - Trans-Pacific Partnership Agreement and how not many people in New Zealand know what it is or that it even exists. The TPPA can potentially wreck life as we know it, here in New Zealand if it is finalised. Unfortunately, more people in New Zealand care about the bullying of a contestant on X-Factor New Zealand, by two judges Natalia Kills and Willy Moon. The reason that more people care about something as silly as X-Factor and not something that could wreck our whole country and way of living is because the TPPA has no face but X-Factor does. Everybody cared about the poor contestant that was bullied because they could identify with him as he is a real person like them.

We decided that the most important thing to keep an audience engaged was the character. What makes an engaging character?

- Wants/needs
- Relationships with others
- Conflict, character through action (dialogue can add nuances)

A character that is robust and follows these basic guidelines, can make a film with a terrible plot interesting and engaging because the audience ends up caring about them.

As screenwriters, we should always AVOID deux machina, which is Latin for machine of God. These are plot cheats or convenient cheats that save your character. We should always AVOID using these as they do not make up a very good or engaging story. We can however, dump misfortune on our characters to place them into trickier predicaments as long as the characters use their own resources to get themselves out of these predicaments.

Hmmmm..... script ideas, anyone???!!!

This week coming, I need to get my beat sheet green lit from my tutor, so that I can start working on my first screenwriting assignment which is a non-dialogue script. My idea is based around a bratty kid at a funeral that has his ipod stolen by a rat and the chaos that ensues. Bring on my script idea!!!!!

Interview Lighting

This week, we applied what we learned about three-point lighting to a class exercise/experiment. We got into groups and had to set up a three-point lighting system as though we were recording an interview. Our requirements were as follows:

- MCU: Medium Close Up shot
- Long-ish lens (not widest)
- Good lighting: three-point diffused (wide light source)
- Experiment with flags as they can cut out unnecessary spill
- Background: depth of field (bokeh), remember perspective (angles, lines), think about composition
- Use C-stands for flags
- Check framing
- Always check: focus, white balance, aperture, exposure and gain
- Put the camera on a tripod and level it out


Three-point lighting set up diagram

My group set up a lighting plan that was similar to this, except for the key light which was pushed back a little further. We recorded footage, first with no diffuse on the lights and then we put some diffuse on both the key and fill lights. The light on the subject was more harsh without the diffuse on the lights and the light was much softer with the diffuse on the lights and therefore, was much more flattering on the subject.

This week we were also given our subjects for our oral presentation assignment. The subjects were given to us at random and my one is; 

"Inverse Square Law and its application to Cinematography."

I  have no idea what this even means but I am researching what it is and how it applies to cinematography. So far, I have worked out that it has something to do with the distance of the light from the subject and how it affects the intensity of the light. Hopefully by the end of my research, I will understand properly what it means and also understand it's applications to cinematography.

Sunday 22 March 2015

Busy, Busy, Busy

We have finally confirmed our script for the collaborative project!!!! I have been busy sorting out heaps of things this week. First of all, my production team and I cleaned the greenscreen that we will be using as there were marks left on it from last year. It looks beautifully clean now and you can not even tell that they were there and where we cleaned it. It did not take long at all either - just a danp sponge and some wiping and boom it was done!

Sarah and Iris cleaning the greenscreen

Selfie with Sarah, Iris and the greenscreen
So, I have sorted out the schedule a little bit, moving deadlines and adding more things that need done. The schedule is a gantt chart that I made using Ganttology. It is a free online gantt chart maker, that can be shared to other people to look at, so they know what's going on and what is due when. I have also completed the budget but I am sending it to my tutors to get their approval and see if anything needs changed. Hopefully, the budget is good enough to get our funding.

There have been meetings that have been had about script, storyboards, concept art, behind the scenes, camera/lighting and vfx/animation. This week coming is full on and we have a million things to get done! I have to open a bank account, have to do meetings with the heads of departments, then the full team not to mention individual meetings when people have issues for me to solve. I also have a location scout to go out on (which is a little bit fun, I guess?!), and a PledgeMe campaign to work on urgently. To be fair there are probably heaps more things that I have forgotten to add to this list but as I get further on in the project, those things will come back to me! Getting excited now! SO STOKED ABOUT THIS PROJECT & I RECKON WE GOT THIS!!!!!

STOKED AS!!!!!

First Aid Assessment Results

I had my final assessment for first aid and I can safely say..... I PASSED! I will be the proud owner of a first aid certificate as soon as it arrives. The last module we learned about was broken bones and strains which I have had plenty of experience with as my daughter is accident prone and has had many broken bones before! We also learned about hypothermia and what to do if somebody is suffering from it.

I have enjoyed gaining this knowledge that could potentially help save somebody's life but in saying that I am glad that I have succesfully completed the assessment and do not need to return to do those first aid classes, mainly because it was a long class (all afternoon every Tuesday) in a horribly stuffy room. 

This week, I also completed my internship proposal which outlined what I intend on doing for my remaining internship hours. It was kind of strange writing a proposal when I have already completed so much of my internship. I would really like to complete my remainig hours on the Human Traces feature shoot later on in the year. This is because I want to be able to be here while I produce the big collaborative project and because I would love to work with the Human Traces team again. They are from New Zealand, professional and just amazing to work with - they are more or less like one huge family. Well, fingers crossed that I will be able to complete it with them and lets hope I won't need to use my new first aid skills!

Lemon Doctor


High Key, Low Key & Three Point Lighting

Lighting has been the subject in cinematography class this week. Lighting can affect the tone, mood and style of any film. It is an important part of cinematography and film in general. We have been learning the difference between high and low key lighting and have been learning about three point lighting as well.

High key lighting has the following attributes:

- bright
- lack of shadows
- lighting ratios are small, reduced
- lack of contrast

Grandma's Boy - Example of High Key Lighting

High key lighting is generally used in such genres as comedy and musical. It purposely has the shadows reduced and this means that there is a lack in contrast.

Low key lighting has the following attributes:

- lots of shadows and contrast
- lighting ratios are large
- darkness, highlights usually pick up the form of the actors
- chiaroscuro - Italian word that means the use of strong contrasts between light and dark, usually bold contrast affecting a whole composition


Harry Potter - Example of Low Key Lighting

Low key lighting is the complete opposite of high key lighting and used for dramatic effect. Films such as Harry Potter and The Godfather use low key lighting.

Three point lighting consists of exactly that - three lights! The three lights found in a three point lighting system are:

- Key light - This is the primary light source

- Back light - This is also known as the 'rim light'. This light provides seperation of the subject from the background

- Fill light - This light fills in the shadows on the face (person) or subject, preventing harsh shadows

The three point lighting system is a simple and most commonly used lighting system to light sets. It is favourable for doing interviews. Also, a kicker light can sometimes be used as well - this light provides definition to background elements but is not a part of three point lighting.

In class, we did experiments using some lights. We set up three different lights and turned off every other light source. We turned each light on, one at a time and filmed the same subject. The lights we used were a pro light, rifa light, rifa light with a soft box on and a fren-l light. I started my experiments using the rifa light with the soft box on it and set the aperture and started filming. Once I was done with this light, I turned off that light and turned on the next one. I did not change the aperture once I had set it. The only things that changed were the different lights I was using. I ended up setting the aperture with the wrong light to start off with and so the experiment did not happen to work out how it was meant to but it still showed the light differences when I switched on a different light. I have never felt that lighting has been one of my strong points (as an animator) but I think with some more research and learning, I may just get there!

His Worship, Mayor Tim Shadbolt

Well, screenwriting this week took an interesting turn with a visit from Invercargill's Mayor, Tim Shadbolt about a feature film. Initially, Mr. Shadbolt had the idea of making the first New Zealand and China collaborative feature film. Our tutor pitched Mr. Shadbolt's ideas of what he wanted and to me it sounded like what he wanted was a tourist promotional video of Southland. Mr. Shadbolt presented us with a different proposal during his visit.

Le Quesnoy ex-mayoral residence

Le Quesnoy (Lay Keen-wah) is a small town in France that has a special connection to New Zealand. During World War 1, the New Zealand army crept into Le Quesnoy and liberated the town without civilian casualty. They did this by climbing up ladders top the town, in the middle of the night with pistols and shooting every enemy soldier while they slept. Le Quesnoy are trying to sell their mayoral residence which is three floors tall and is a very grand looking house. This residence has recently been offered to the New Zealand government to be purchased but the government have turned down the offer to buy it.

So..... good old Tim wants to purchase the residence because he feels that the battle that was fought by the New Zealand army at Le Quesnoy is an important piece of New Zealand's history. This all comes back to the idea of a feature film. Mr. Shadbolt thinks that if he made a film as well as some promotional videos, that he may be able to use these to try and get people interested in helping to put money towards purchasing the Le Quesnoy mayoral house to turn into a war memorial and hotel.

First of all, we found out what the imperatives were for the film - these were things that the film had to have. The imperatives were:

1. Promote Southland filmmaking
2. Showcase Southland - Tourism
3. Anzac Heritage (Western Front WW1)
4. Chinese interests

Somehow, we had to try and formulate a story idea that included all four of these imperatives. Mr. Shadbolt told us a story about Rewi Alley, who was a soldier in World War 1 and resided in Southland on a farm at Castlerock, near Dipton. Rewi fought in World War 1 and was awarded a bravery medal after being shot through the hips. After the war, he moved to China and became somewhat famous over there. Once he moved to China, he adopted a couple of sons and bought them up as his own. It is unclear whether or not he fought in Le Quesnoy but he has living relatives in Canterbury that may have his war records which would tell us if he fought in Le Quesnoy or not.

Anyway, there are a few angles and ideas for a story that we could possibly go with for this film and they are:

1. The story of Le Quesnoy
2. The story of Rewi Alley
3. Historical/Period drama
4. Contemporary drama with flashbacks

The story ideas that were generated from all of these ideas and imperatives are as follows:

- Rewi's two children (China?), bookend device - Relatives visit France
                                                                             - Flashback to historical drama
- SIT Chinese student researching Rewi - Researching around Southland
                                                                             - Link to flashback of Rewi's life
- Rewi's grandchildren come to Invercargill to reconnect with his past - Links to French by boy/girl romance

We just need to figure out which story would be the best choice for this particular project and hopefully this week in screenwriting class, we get the opportunity to explore these ideas further. All things considered, I think that this could be an interesting process and project. I enjoyed the new things that I have learned as I enjoy learning new things about history and especially New Zealand history. I look forward to seeing where all of this goes!

Sunday 15 March 2015

Beat Sheets & More

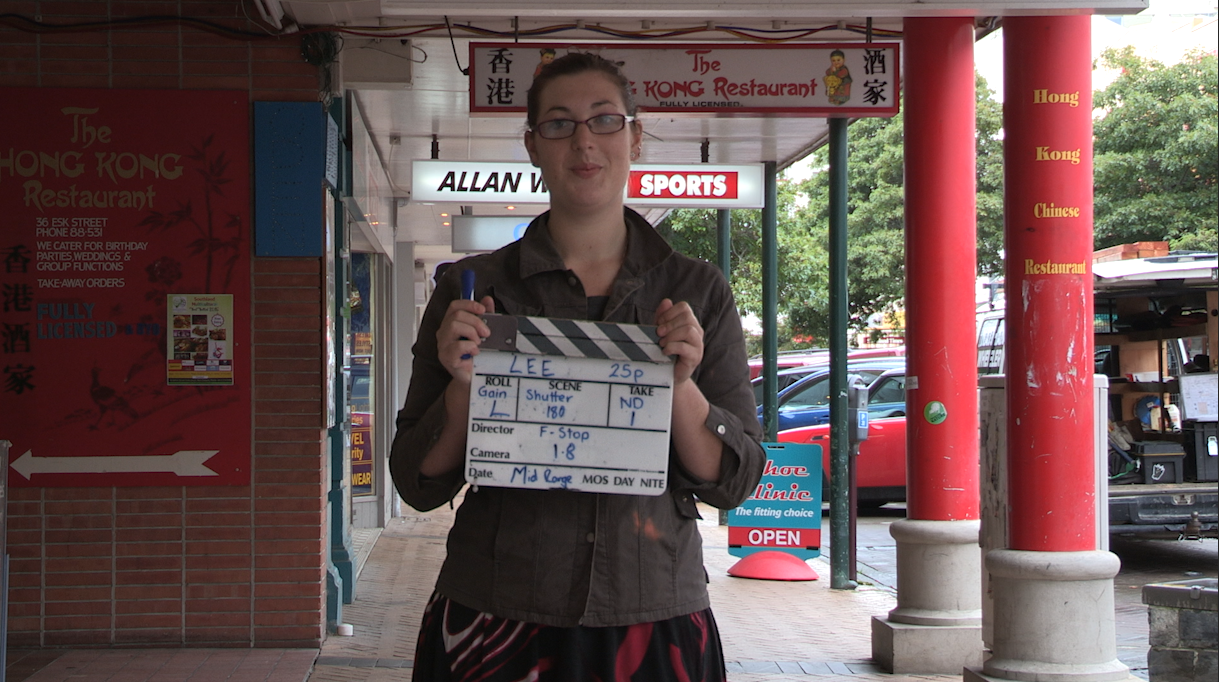
Caution: Writer at Work

There is a whole process to writing a script to finished quality, all formatted correctly with a clear, refined (hopefully) story. This week, our class had a go at writing a beat sheet and a step outline as well as discussing a script treatment and outline/synopsis. I will start off by giving a description of each of theses steps.

Beat Sheet - Breakdown of major plot points
                   - Significant narrative plot points
                   - (Generally) First step in script development
                   - Repository for your raw creative ideas
                   - Rough but coherent
                   - Working document that is only seen by the writer or writers for personal use

Step Outline - Still a working document for personal use
                      - Fleshed out plot ideas into coherent prose
                      - Each paragrah is its own scene

Treatment - Formatted
                  - 12pt Courier, Arial or Times New Roman font
                  - Basic layout conventions
                  - Indented beginnings of paragraphs
                  - Coherent prose
                  - Descriptive evocative language
                  - Treat this like it is a sales project
                  - 20-50 pages (Feature film)

Synopsis/Outline - Basic bare bones
                             - Story coverage
                             - 5-15 pages (Feature film)

Scripts are generally written using all of these steps, in the same order that they are written above. A beat sheet is a list of bullet points that happen in each act but describe each significant part of the film. A step outline is a more fleshed out version of the beat sheet. John Truby and Blake Snyder
(Save The Cat) have a slightly different view about how a script should be created.

The Anatomy of Story - John Truby

John Truby believes that there are 22 steps or building blocks to write a succesful script. Truby takes inspiration from Joseph Campbell and combines Campbell's mythic story structure (used for films such as Star Wars) with some original expansion to create his 22 building blocks. This means that the overall structure follows a three act format. Here are the 22 steps:

ACT 1
- Self realisation, need, desire
- Ghost and context
- Problem/Need
- Inciting Incident
- Overall desire (start low)
- Ally/Allies
- Opponent/Mystery
- Opponent/Ally
- First reversal and decision: Changed desire and motive

ACT 2
- Plan
- Opponent's plan and first counter attack
- Drive
- Attack by ally
- Apparent defeat
- Second reversal and decision: Obsessive drive, changed desire and motive
- Audience revelation about opponent/ally
- Third reversal and decision

ACT 3
- Gate, gauntlet, visit to death
- Battle
- Self revelation, thematic revelation
- Moral decision
- New equilibrium

These 22 building blocks can be cut down into seven steps. Truby states that these seven steps are characteristics and all stories in their growth and development, from beginnging to end have these. The seven steps are as follows:

1. Weakness and need - A hero with a weakness and a need

2. Desire - The foundation of the story that helps drive the hero (Desire/want is not the same as a need) 

3. Opponent - This is often the antagonist and this character must go against the protagonist by wanting the same thing

4. Plan - Plan of action

5. Battle - The boiling point and crisis

6. Self revelation - The hero realises what he wanted was not what he needed (Remember that desire/want is different to need)

7. New equilibrium - The world changes for the character because of the new knowledge gained


Truby's building blocks and seven step ideas are based around the character and the decisions and changes that they make along their journey. These decisions and changes influence the way that the journey/story progresses.

Save The Cat - Blake Snyder

Blake Snyder's book called "Save The Cat" is about creating a formula for writing a feature script. Snyder has broken up the three act script into a beat sheet of 15 different beats. He also defines how many pages of script should be committed to each step/beat, based on a 110 page script. The steps/beats are as follows and the page count is the number in brackets:

1. Opening Image (1): The first thing you see that sets tone, style and mood

2. Theme Stated (5): A character other than the hero/protagonist makes a statement that describes the theme. This is known as thematic premise 

3. Set-Up (1-10): All characters in the main story should be introduced and the hero's wants and needs should be stated

4. Catalyst (12): A life changing event that forces the character to act outside of their comfort zone to fix the balance in their life and restore order

5. Debate (12-25): At this point the character either has a choice or no choice
(after the life changing event). This part of the script should show how daunting the tasks ahead are for the character by having them struggle with their decision or hesitate to act on their decision

6. Act Two Plot Point (25): Major changes happen on all levels of the story as the world changes from ordinary into adventure. The very middle or heart of the change is the character's decision to act

7. B Story (30): The B story is never entirely clear but Blake Snyder says that it is the love story. The characters in B story do not always appear in the first act and Snyder does not say what the B story does or is but he does say that it does a lot

8. Fun and Games (30-55): This part of the story is lighter in tone than before because all the intense work of introducing characters and the set up is finished. 

9. Midpoint (55): This can either be a high peak (victory) or a low peak (defeat) for the character but either way it will be false and it is time to get back to the story - no more fun and games

10. Bad Guys Close In (55-75): Depends on the outcome of the last step - if it was a victory for the character then the bad guys regroup and if it was a defeat for the character, the bad guys consolidate and prepare for the final assault

11. All Is Lost (75): The hero is at wits end and is often faced with death at this stage

12. Dark Night of the Soul (75-85): This is expansion of the hero's dilemma and it asks a few different questions such as will the hero break? Will the hero accept the situation? How will the hero react? And also is there a solution?

13. Act Three Plot Point (85): A solution for both the main story and B story that needs to be implemented

14. Finale (85-110): All lessons learned are applied and the bad guys are defeated in ascending order. The hero is triumphant

15. Final Image (110): The closing image is the last thing you see. This hould be the opposite of the opening image so that it shows the changes that have happened

Blake Snyder's approach is different to Truby's as Snyder's ideas seem to be more about the theme or lessons that are forced onto the character and must happen. The ideas behind a how a story should progress seem to have little to do with the character's own journey but more about the things that are forced upon the character (this includes the events that "must" happen).

I think both of these ideas could be useful in writing my own scripts however, I feel that Snyder's Save The Cat ideas are more telling you what must happen at a specific point rather than just being guidelines. I can see how many films fit into these steps but I somewhat wonder if some films have been forced into fitting into these steps? 

Rough Script Confirmed - Casting Call Time

We now have a couple of rough script ideas for our big project. By the end of next week we should have the final script and plan on having character biographies and some concept art to go with it. I am starting to get really excited about this project and we have started to get very, very busy.

Casting Call Poster 2015

Today and tomorrow, we are holding a mass casting call (auditions) for people of all ages and all skill levels. The people that come along to this casting call will have their details, photos and footage (of their audition) uploaded to a database for all digital media students to be able to use to find actors and actresses for film projects and voice actors for animations. The database will keep all the auditionees details confidential from the general public and will only be accessible by using a log in and password.

So far, there has been some really talented people come through the casting call. They have been all ages and skill levels with many different cool and wonderful talents. Our first auditionee today, was an amazing 11 year old girl who had the most amazing singing voice! 

Director

We plan on holding auditions next weekend, specifically for our project. Any talent that our director (Dan DeLaet) decides will fit the roles in our script will be called back and invited to our special auditions. I am looking forward to seeing what talent Southland will bring us tomorrow and I am hoping we may find some talent that will fit the roles of the characters in our big project script.


Assessment Time

In first aid, the time has finally come for the class to be assessed for our certificates. We spent our last class learning about responsiveness, asthma, convulsions, diabetes, poisons, how to apply bandages and slings to victims and learned about strokes and concussion.


Convulsion Management

The two main things that interested me the most were how to apply bandages and slings and about convulsions. My brother suffers from convulsions/seizures and it's scary when it happens. It was interesting to see what different kinds of convulsions there are and how they are meant to be managed. I was interested in how to apply bandages and slings as well because my daughter is constantly injuring herself while playing sport or just generally playing with her friends. This skill could come in handy for the next time she hurts herself (which will hopefully be a long time away).


Our next class on Tuesday, we will be learning our final unit on bone breaks and fractures as well as our final assessment where in groups we will role play a situation where first aid is required.  We will be placed in scenarios where all of the skills that we have learned over the past four weeks are tested to make sure that we are competent. I am hoping that I have practiced and studied enough to pass this assessment and by the end of Tuesday next week, I will hopefully be the proud new owner of a first aid certificate.

Wednesday 11 March 2015

Aperture, Gain and ND Filters - Cinematography

In class, we have been doing some practical exercises using the camera which involved us changing the shutter angle, ND filter, aperture, gain and the focal length of the lens. These experiments were to show us how these things work and how focal length and aperture change the depth of field of the image.

My group used a Canon camera for these experiments. We had a sheet with twelve different set ups on it that we had to do in our groups of three. We each took turns at taking control of the camera and setting it to all the settings that were required. Each person had to frame up a mid shot of a person (subject) with an interesting background and go through each set up which consisted of three different focal lengths - wide lens (zoomed all the way out), mid length (zoomed half way in) and a long length (zoomed all the way in). The shot had to be a mid shot of the same subject at each focal length.

At each focal length, there were four images that needed to be taken, each with slightly different settings. Following is each of the four different settings that were required:

1. Shutter Angle: 180
    Gain: Low (0dB)
    ND Filter: 0
    Set aperture for correct exposure

2. Shutter Angle: 180
    Gain: Low (0dB)
    ND Filter: 1
    Set aperture for correct exposure

3. Shutter Angle: 180
    ND Filter: 2
    Adjust gain if image is too dark for acceptable exposure
    Set aperture for correct exposure

4. Shutter Angle: 90
    Gain: Low (0dB)
    ND Filter: 1
    Set aperture for correct exposure

Here are screenshots of my experiments:


1.

2.

3.

4.

5.

6.

7.

8.

9.

10.

11.

12.


Unfortunately, I did not focus the camera clearly on my subject in the last four images (long focal length), so the footage came out looking too soft and there was no definition in the background to show the depth of field.

The gain affected the image by making it look grainy when it was set on medium and high gain. High gain was the grainiest. From this lesson, I learned that the gain should never be touched unless its really needed like at night time.

ND filters affected the light that was seen in the image. It dulled down the brightness of the glaring light (if you look in the corners of the images where the sky is, there is a slight difference in brightness) but it did not affect the light on the subject in the image.

The aperture affected the depth of field. As previously discussed in my post about aperture, if there is a higher f-stop (small lens opening) then the depth of field is deeper and if you use a lower f-stop (larger lens opening) then the depth of field is shallower. Unfortunately, because of my lack of focus (on the camera) the images can not be properly compared.

I have learned heaps of different things by doing this exercise and I plan on doing this exercise again, so I am able to practice using the camera and this time I will hopefully remember to use the focus on the camera. Come on, Lee - FOCUS!

Sunday 8 March 2015

Cutting Out the Fat - Scripting

Our project is starting to come to life! We have ideas flowing and scripts being written and decisions being made! Last week, we cut down all our possible story lines to two main themes. One was the idea of an alien bounty hunter and the other was about people getting lost in technology. This week we have cut it down to one theme - alien bounty hunter/encounters involving a different planet and the genre is Sci Fi. So, now it is up to the script team to come up with something for us to create.

Sci Fi setting

Everybody has been advised of their role in the crew now with some roles yet to be named, particulary the post production roles. As well as the script team being hard at work, we have our art team busy at work on researching ideas for possible styles and concepts of characters, the setting and environments.

Little Miss Busy - This is me from here on in!

My work load has become busy from this point on as I have to set up a bank account, work out a budget, set up social media for promotional purposes, find a location to set the greenscreen up, organise people to make sure everything that needs done is worked on and completed on time and I have to work with the HOD's (Heads of Departments) to write up a massive schedule that includes deadlines for every step of every different department.

I am starting to get excited about this year's project - the people in the group are a great bunch of people who are motivated, focused and hard working! This project feels well organised and the whole team is driven to making this project become a great success! Onwards and upwards from here on in and keep watching this space!

Excited!!!!!

Crystallize Your Objective

In screenwriting class, we are focusing on non dialogue scripts. Non dialogue scripts are literally just that - no dialogue. These films have no dialogue and use visual images with music to tell the stories that the creator wishes to tell. One of the assignments that we have been given is to write a non dialogue script, so we have been doing exercises in class to help us with this.

Objectives - The wee figure wants to get to the platform eith objective written on it!

As a group, we all came up with locations where a story/film could happen. We each chose a location - I chose a funeral. Each person in the group was instructed to come up with a character giving them an age, a gender, profession and three personality traits. The next step was to give the character an objective. These were my choices:

CHARACTER: Jimmy Cameron
GENDER: Male
AGE: 12
PROFESSION: Junior High Student
PERSONALITY TRAITS: Low attention span, devious, prankster

OBJECTIVE: Catch the rat that has just stolen his ipod

Look out obstacles ahead!

The next instruction we were given was to pass our piece of paper with all these details to the person sitting to the left of us. It was now up to that person to come up with an obstacle that prevented that character from carrying out their objective. This obstacle had to be well thought out as some of the ideas within the group were not immediate obstacles and became long term obstacles that needed to be overcome eventually. The rules of these story ideas were that the entire thing had to happen at the location that was chosen and each person had to decide whether the obstacle was a person - antagonist, physical, mental or a time factor.


Obstacles

We worked through each person's obstacle idea to make sure that they immediately worked against the objective. The reason the obstacle needed to be an immediate problem was to create drama and make the story interesting for audiences because without this drama, a film becomes boring. We also had to wrap our heads around how to show things in a visual nature without characters talking (no dialogue). Sometimes it was not the obstacle that needed changed but the objective needed to change for the obstacle to work.

The objective of the character needs to be well defined, as well as the obstacle that stands in their way (no matter what that may be) to create drama and so the audience can clearly define what is going on. If these lines are too murky then the audience will lose interest or become confused and then nobody will want to watch your film. So, this weeks lesson in screenwriting was as simple as this: "Crystallize your objectives and obstacles."

Aperture & Depth of Field - Cinematography

This past week I have been learning about aperture, what it is, what it affects and then physically applying it to photos, comparing each different aperture setting. So, first of all what is aperture?

Aperture and Depth of Field example

Aperture controls how open the lens is which in turn lets a certain amount of light come in through the lens. Aperture is measured on a camera by f-stops. If the f-stop is high then the opening of the lens is small but if the f-stop is low then the lens is opened wider and when the lens is opened right up, more light can get in. Aperture is used in conjunction with shutter speed to gain the correct exposure and as the aperture changes, the shutter speed needs adjusted to gain the correct exposure.


Examples of different f-stops

The aperture affects the depth of field of your shot. The depth of field is the range of acceptable sharpness in your image. The depth of field can either be shallow or deep and defines whether your background is sharp and detailed (deep) or whether your background is blurred and shallow. Bokeh is a japanese word that is used to describe extreme background blur (out of focus). If you have a higher f-stop (small lens opening) then your depth of field will be deeper and if the f-stop is lower (wider aperture) then the depth of field will be shallower. Above are two examples of the same image but using different f-stops.

Here is a YouTube link that discusses aperture, f-stops and shows a progression of images showing different depths of field:  https://www.youtube.com/watch?v=ZhDODaUN3pI

I am slowly getting my head around aperture, depth of field and shutter speed and how they all relate to one another. Check out this blog next week for the next update of things I have learned to do with cinematography.

Saturday 7 March 2015

First Aid

First aid is sometimes the only reason that somebody pulls through and survives an accident. It is a valuable skill to learn and just like many other industries, it is definitely something that every film member should learn.

Bandage Man

The first aid course that I am taking is four hours a week for four weeks. We have learned how to slow down or stop external bleeds, putting a person into the recovery position, the meaning of the acronyms STOP and DRS ABCD and this past week we learned how to administer CPR. This post will be talking about what I have learned about CPR and will also explain the two acronyms STOP and DRS ABCD.

STOP
When you come across a person who has had an accident or is in need of first aid the first thing you should do is remember the acronym STOP and carry out each step carefully to make sure that you as the first aider, are protected from any potential harm or dangers.

S - Stop
T - Think
O - Observe
P - Protect

Stop - Stop and assess the situation before rushing into anything.
Think - Think about whether you are capable of managing the situation by yourself and also what equipment you need such as a first aid kit and protective clothing. Last but not least you need to think about ringing 111 to call for an ambulance.
Observe - Check for dangers that could put you at risk while trying to help the victim.
Protect - Protect yourself from any body fluids from the victim that might cause you harm by infection or cross contimination of disease or illness. Take measures such as wearing face masks, full face shields, gloves, rolling down long sleeves, keeping cuts covered with waterproof dressings and washing your hands thoroughly after treatment.

DRS ABCD
The next acronym to remeber is DRS ABCD and these are the steps to follow when administering first aid to a victim.

D - Dangers
R - Responsive
S - Send for help

A - Airways
B - Breathing
C - Compressions
D - Defribillator

Dangers - Check for any dangers that may harm you and check that you can walk right around the victim without coming across any hazards.
Responsive - Tap the victim a few times while calling loudly asking them to if they are alright.
Send for help - Send somebody to call 111 and ask for an ambulance to be sent. This can only be done if you are not alone. If you are alone, then carry out the next few steps for a minute and then put the victim into the recovery position while you go and call for help.
Airways - Move the victim so they are lying on their back and position their head, so that the end of their nose is pointing upwards. This is to give their airway the best possible position for breathing.
Breathing - Check whether the victim is breathing by feel, sound and sight. Place two fingers under the chin or a hand on the chest. Check to see if you can see their chest rising and put your ear to their mouth to see if you can hear the victim breathing.
Compressions - Start compressions on the victim.
Defribillator - Connect a defribillator and follow the prompts on the machine.


CPR being practiced on a CPR dummy


CPR
CPR stands for Cardio Pulmonary Resuscitation. This literally means restarting the heart and lungs of a person. The ratio is thirty compressions to two breaths. The compressions are done at the base of the sternum in the middle of the chest and the pressure you use is one third down. If the victim is a baby the compressions are administered using two fingers, a child's compressions are administered using one hand (or two depending on the build of the child) and for an adult two hands are used. Compressions need to administered using a nice even rhythm. After thirty compressions are done, then two breaths need to be given to the victim. The head must be put in the correct position so that the airway is nice and clear. For a baby, you must place your mouth over the nose and mouth creating a seal and small puffs are used. If the victim is a child or an adult, you must pinch the nose and place your mouth over the victim's whole mouth creating a seal and give two full breaths. You will see the chest rise if these are given correctly. Too much air will full up the diaphragm and will need to be expelled from the victim, so that the breaths given can be effective and the victim can use their diaphragm muscles to draw air into their lungs by themselves.

I am enjoying learning first aid and just hope that I never have to use it. However, if I am in a situation that requires me to use it, then I feel as though I am well equipped to deal with the situation. I will be able to use my first aid skills to try and give somebody more of a chance to survive.

First Aid


Sunday 1 March 2015

Group Collaboration - Major Group Project 2015

With this new year of study comes a new collaborative group project. Last year, I worked on this same project but I was an animator then and now I am a filmie (film student). I am looking forward to working on this project as I will be working with a whole different group of people with only a small few familiar faces.

Study, study, study


The brief we have been given for this project is different to last year's brief. This time it is up to the group as to what kind of product we are going to create - short film, trailer, cinematic, game. We are currently working towards creating a concept for this product and then we can decide which format would suit the concept.

I have been given the job of Producer which is what I requested to do as a job because this is the area that I want to head my career path down. It would have been pointless to me if I had have been put elsewhere because this is my last year of study and I want to make it as productive as possible to help me head my career in the right direction.

Watch this space for some awesome ideas and updates on the whole process. Bring it on!!!!!

Achieve, learn, inspire

FILM REVIEW: Iron Man 3 - Screenwriting

My daughter and I share a love of superheroes and love films like The Avengers, X-Men and Iron Man. This means that most weekends, we watch some form of action film as a way to spend time together. We own some of these films and they are watched repeatedly but are enjoyed all the same every time. Recently, my daughter and I watched (for the 50th time) Iron Man 3 and so I decided this would be the film that I would write a review about for the first time on this blog.

Iron Man 3

Iron Man 3 was directed by Shane Black and produced by Kevin Feige and was released in 2013. The lead character is Tony Stark who is played by Robert Downey Jr. Iron Man 3 is the third film in the trilogy of Iron Man films. All films in this trilogy are a mixture of CG (comuter generated effects) and live action.

Synopsis
Iron Man 3 is set just after The Avengers film that Iron Man starred in as well. Tony Stark has insomnia after coming home from fighting with The Avengers to save the world. In this time, Tony has developed the latest prototype for the Iron Man suit. Big explosions happen all over Los Angeles and a terrorist leader using the name Mandarin claims resposibility.Tony Stark challenges Mandarin which results in Tony Stark's home being destroyed. This leaves him with nothing but a faulty prototype suit to find out who is behind the attacks, so that he is able to save the world and most importantly the woman that he loves.

Marvel Logo with characters

I love action films and this particular genre is among my top five favourite genres, so naturally I loved this film. I especially loved it because of Iron Man. As I wrote earlier, my daughter and I are superhero fanatics (I forgt to add we especially love Marvel characters) and Iron Man is one of our favourites. I have watched this film many times but I still feel the same when I watch it. At the beginning of the film I feel concerned for Tony Stark and slightly annoyed about the predicament he is currently in. When Tony Stark challenges the terrorist, I feel excited about the action that I know will happen as a result of the challenge. From this point on in the film, I feel excitement, wonder and warm fuzzies from some of the small touching moments in the film. I am also amazed at the technical things in the film. Last year, I completed a degree majoring in animation and I have a new appreciation for all the hard work that goes into the CG in a film like this. The CG in this particular film is a source of interest for me because I have only done basic things and the CG in this film is much more complex.

Robert Downey Jr. as Tony Stark, the man in the suit - Iron Man

My favourite character in this film is the lead character - Tony Stark (Iron Man) because without Tony Stark there would be no Iron Man. Tony Stark is not only the person who builds the Iron Man suit but he is essentially the man inside the suit making him Iron Man. I like the way that Tony Stark is a straight up, intelligent man who just seems to speak his mind in an intelligent manner and without stepping carefully around the actual issue. He is just straight to the point and anything that he says in an arguement, he can back up based on his knowledge. Some people (in the film) do not like his approach but he just does not care what anybody else thinks about him with one exception - his wife, Pepper Potts. He also has a soft. loving side too, which is shown in the film when he chooses to put his wife into his newest Iron Man suit to protect her and the lengths he goes to for her safe rescue. It shows that he is a straight up prick but that he is a loving man and husband as well.

There were never really any moments during the film where I disengaged with it. There's heaps of action and twists and turns to keep the audience engaged and because I like Iron Man and the CG effects in the film that was enough to keep me interested the entire time.

The strengths of the film were the CG effects and the Tony Stark/Iron Man character. These two things stood out to me in this film for reasons that I have already discussed. The weaknesses were the story seemed way more complex than it needed to be and the antagonist group were poorly developed because they seemed disconnected to the whole story and didn't seem to fit in and make sense anywhere.

Iron Man 3 is the best film out of the trilogy because who doesn't like a film that has every kind of different Iron Man suit one could ever imagine, show up in it all at the same time?! I love Iron Man, so I would recommend this film to anyone who enjoys action films, Marvel characters or anyone who is interested in VFX (visual effects)/CG.  

The suits assemble for war! (screenshot)